Key Takeaways
- Understanding local laws is crucial before building your container studio.
- Zoning codes in Hillsboro determine where and how you can build.
- Permits are non-negotiable, but with the right info, they’re easier to navigate.
- Choosing the right location is about more than just the view—it’s about compliance.
- Designing within regulations doesn’t limit creativity; it challenges you to think differently.
Starting Off Strong: Know Your Legal Groundwork
Before the first hammer swings, let’s talk legality. Hillsboro, like any city, has its own set of rules when it comes to building structures. These aren’t there to stifle your creativity but to ensure safety and order. Think of them as the boundaries within which your creativity can safely play. You wouldn’t want to build your perfect studio only to find out it’s not up to code. So, let’s get familiar with what Hillsboro expects from your container home studio project.
Deciphering Hillsboro’s Zoning Codes
Zoning codes can sound like a foreign language, but they’re really just a map to your build’s location. In Hillsboro, different areas are zoned for different uses. Some are for residential, others for commercial, and some might not allow container structures at all. It’s like a game of ‘Location, Location, Location’—you’ve got to find the right spot that says ‘yes’ to your studio dreams.
My Favorite Container Homes Resource
I compared the top 3 Container Home Guides
to discover the ultimate resource!
See my top recommendation here
Here’s what you need to do:
- Visit the Hillsboro Planning Department’s website or office.
- Find the zoning map and see where container homes are welcome.
- Check if your desired location is in a residential, commercial, or mixed-use zone.
- Understand the setbacks, height restrictions, and lot coverage rules.
- Speak to a planner if you’re unsure. They’re there to help guide you.
Remember, zoning codes are in place for a reason. They keep the city functioning smoothly and maintain the quality of life for everyone. By following them, you’re not just building a studio; you’re becoming a responsible member of the Hillsboro community.
Navigating Container Home Permit Procedures
Now, let’s tackle permits. You might think of them as just another hoop to jump through, but they’re really a stamp of approval on your safety and design. In Hillsboro, obtaining a permit means your container home studio meets the standards that keep you and your neighbors safe.
To get your permit, you’ll need to:
- Submit your building plans for review.
- Ensure your design meets all building codes and energy efficiency requirements.
- Have your site plan ready, showing where your studio will sit on your property.
- Pay the permit fees—consider it an investment in your project’s success.
- Be patient. Review times can vary, but it’s all part of the process.
Think of the permit process as a helpful checkpoint. It’s there to catch any potential issues before they become real problems. And once you have that permit in hand, you’re cleared for takeoff.
Laying the Foundation: Pre-Construction Essentials
With your legal ducks in a row, it’s time to prepare for the build. This is where your vision starts to take shape. You’ll need to consider the soil, the slope, and the sun—each plays a pivotal role in the success of your studio. It’s not just about the structure; it’s about how your studio will live in harmony with its surroundings.
Here’s your pre-construction checklist:
- Get a soil test to ensure the ground can support your studio.
- Plan for drainage to keep water away from your foundation.
- Consider the path of the sun for the best light and energy efficiency.
- Think about access for construction vehicles and future visitors.
- Decide on utilities—will you connect to the grid, go solar, or both?
This stage is all about setting yourself up for success. A solid foundation means a stable studio, and good planning means fewer surprises down the road. So take your time, think it through, and build it right.
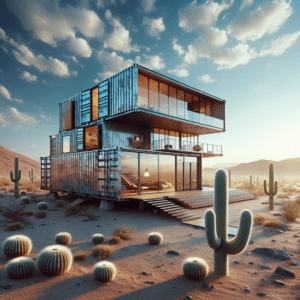
Picking Your Plot: Location Scouting in Hillsboro
Choosing the right spot for your container home studio is a bit like finding the perfect canvas for your masterpiece—it’s got to inspire you. But it’s not just about the view or the vibe; it’s about making sure the land is build-ready and regulation-friendly. In Hillsboro, your ideal plot should tick a few boxes to ensure your project doesn’t hit a snag.
What to look for in a plot: Before you embark on building your container home studio in Hillsboro, it’s crucial to find the right location. Not all plots are suitable for such a construction, and you’ll need to consider factors such as zoning laws, the slope of the land, soil condition, and access to utilities. Familiarize yourself with Hillsboro’s building permits and zones to ensure that your chosen plot complies with local regulations.
- Proximity to necessary utilities like water, electricity, and sewage.
- Accessibility for building materials and future visitors.
- Topography that won’t require excessive excavation or land modification.
- A neighborhood that reflects the character of your future studio.
- A clear understanding of property lines to avoid disputes.
- And most importantly, a location that aligns with zoning laws.
Think of your plot as the seed from which your studio will grow. It needs the right conditions to thrive, so choose wisely and with foresight. A great location can make your studio not just a place to work, but a destination.
Designing for Compliance: Aligning Your Vision with Regulations
When it’s time to put pen to paper and draft your studio’s design, remember that compliance with local regulations isn’t a barrier—it’s a guideline. Your design should reflect your personality and meet your needs, but it also needs to fit within the framework of Hillsboro’s building codes. This is where creativity meets practicality.
Design tips to keep you compliant:
- Factor in energy efficiency—think
and window placement. - Consider height restrictions to avoid any towering troubles.
- Keep your studio’s footprint within property boundaries and setback limits.
- Design with the future in mind—what if you want to expand?
- And remember, safety is stylish—ensure your studio is up to code.
Your studio’s design is a reflection of your artistry. By aligning your vision with regulations, you’re not just building a structure; you’re crafting a legacy.
Blueprints to Building: From Permits to Hammer Hits
With your legal and logistical bases covered, it’s time to transition from the theoretical to the tangible. Blueprints become walls, and ideas turn into infrastructure. This is where your studio starts to take shape in the real world, and it’s an exciting phase full of progress and potential.
The Permit Checklist: What Hillsboro Expects
Before the first nail is driven, Hillsboro needs to see your plans. The city’s checklist is your roadmap to a green light on construction. It’s detailed, but don’t let that intimidate you—it’s simply a way to ensure everything is accounted for before you begin.
Your permit checklist should include:
- Detailed construction drawings with measurements and materials.
- A site plan showing the studio’s location on your property.
- Proof of compliance with local zoning and building codes.
- Energy efficiency calculations and environmental considerations.
- Payment for any applicable permit fees.
- Patience and persistence—sometimes the process takes time.
This checklist is your ticket to a smooth build. Cross off each item, and you’re one step closer to breaking ground.
Breaking Ground: First Steps in Construction
It’s a momentous day when construction begins. The land is prepped, the foundation is laid, and your vision starts to become a reality. But before the excitement takes over, let’s focus on the first steps to ensure your build goes off without a hitch.
Breaking ground the right way:
- Start with a clean and level site to set the stage for construction.
- Lay a strong foundation that adheres to structural requirements.
- Install utilities early to avoid disruptions later on.
- Keep communication open with your contractors and city inspectors.
- Document the process—you’ll thank yourself later.
These initial steps are the backbone of your build. They set the tone for the entire project, so take them seriously, and you’ll be setting yourself up for success.
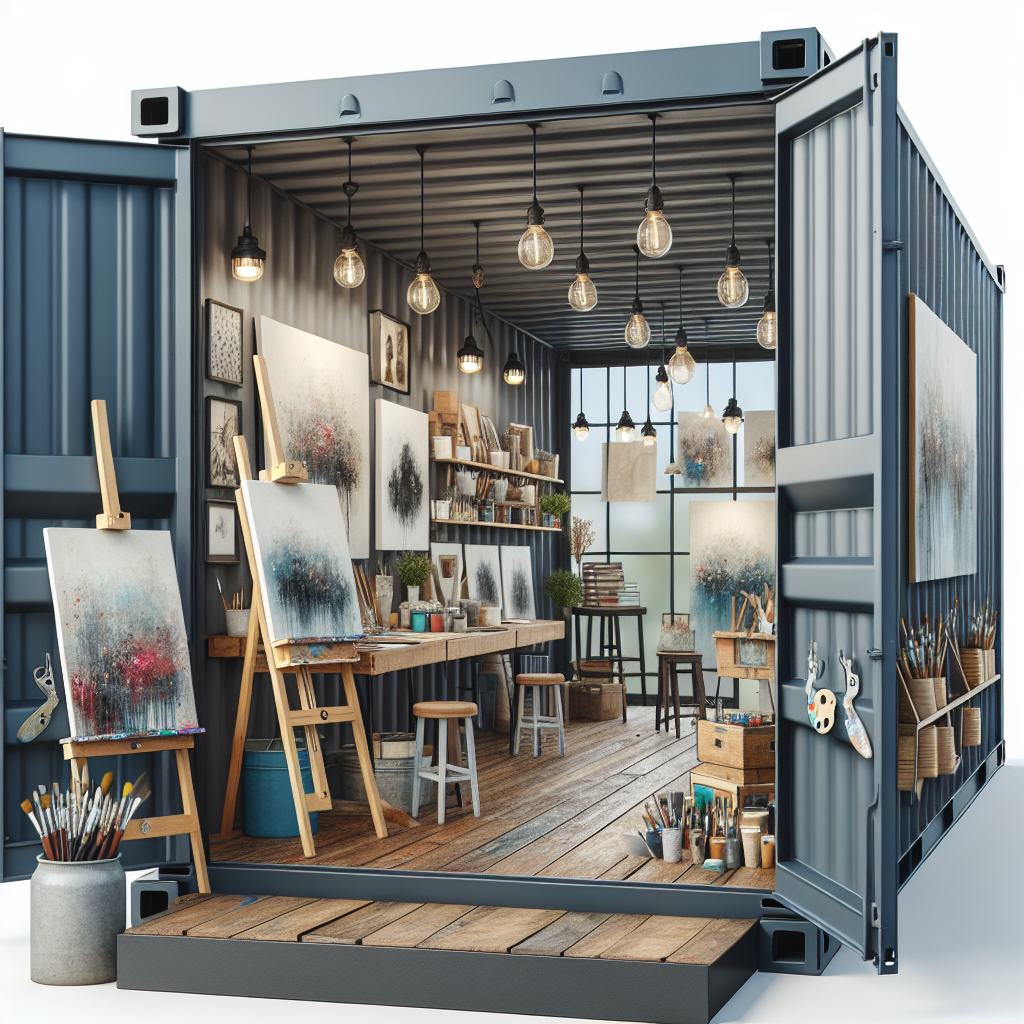
Inside Out: Creating Functionality and Aesthetic Appeal
As the walls of your studio rise, it’s time to think about the inside. This is where form meets function, and your studio truly becomes your own. It’s not just about making a space that looks good—it’s about creating a space that feels good to work in and sparks your creativity.
Consider these elements to blend functionality with aesthetics:
- Maximize natural light for an inviting workspace.
- Choose materials that inspire you but also insulate sound.
- Plan for plenty of storage to keep your space uncluttered and your mind clear.
- Think about workflow—where will you spend most of your time?
- Don’t forget comfort—ergonomics are essential in a space you’ll use daily.
Your container home studio is more than a building; it’s an extension of your creative self. By focusing on both functionality and aesthetic appeal, you’ll create a space that not only serves your art but also feeds it.
Orienting Your Layout: Maximizing a Studio Space
When you’re crafting the interior of your studio, every square inch counts. It’s about striking a balance between what you need and what you can fit. Think of it as a puzzle where each piece should serve a purpose. Orienting your layout means considering how you move through your creative process and carving out a space for each step.
Here’s how to make the most of your studio layout:
- Place your desk or workbench near a window for natural light.
- Use vertical space with shelves to keep the floor area open.
- Consider foldable or multi-purpose furniture for flexibility.
- Designate zones for different activities to keep your workflow organized.
- Keep your tools and materials within arm’s reach to maintain focus.
By thoughtfully arranging your space, you create a studio that not only facilitates your work but also adapts to it. This is where your creativity will flourish, free from the constraints of clutter and inefficiency.
Material Matters: Choosing What’s Best for Your Build
The materials you choose for your container home studio are more than just a matter of taste—they affect everything from temperature control to acoustics. It’s important to select materials that not only look good but also contribute to the functionality of your space.
Here’s what to consider when selecting materials:
- Insulation is key—choose materials that will keep your studio comfortable year-round.
- Acoustic treatments are essential for sound-sensitive work.
- Durable flooring can withstand heavy use and is easy to clean.
- Windows and doors should provide security as well as aesthetics.
- Exterior finishes must be weather-resistant and reflect your style.
Remember, the right materials can make all the difference in creating a studio that’s both inspiring and enduring. Choose wisely, and your studio will be a testament to both your work and your craftsmanship.
The Finishing Touches: Post-Construction Approval
Once the dust settles and the last nail is in place, your studio isn’t quite ready for its close-up. There’s a critical step left—securing post-construction approval. This phase is about dotting the i’s and crossing the t’s to ensure everything is up to snuff.
Final Inspections: Ensuring Your Studio Meets Standards
Final inspections are the gatekeepers to your studio’s future. They’re not just a formality; they’re a safeguard. Inspectors will check that your studio is built to code, safe to occupy, and ready for action.
Here’s how to prepare for final inspections:
- Review your permit requirements and ensure all conditions are met.
- Test all electrical, plumbing, and HVAC systems ahead of time.
- Keep a record of inspections and approvals throughout the build.
- Address any issues the inspector identifies promptly.
- Understand that this step is for your benefit—a safe studio is a productive studio.
Passing your final inspections is a milestone. It means your studio isn’t just built; it’s built right. And that’s something to be proud of.
Ready for Residency: Obtaining the Certificate of Occupancy
Getting the keys to your studio is a moment to savor, but first, you need the certificate of occupancy. This certificate is your green light—it means your studio is legally recognized as a safe, habitable space.
To obtain your certificate, make sure:
- All inspections are passed and documented.
- Any outstanding fees or paperwork are settled.
- You’ve met all the conditions outlined in your building permit.
Once you have this certificate in hand, your studio is officially ready for you to move in and start creating. It’s the end of one journey and the beginning of another.
Your Studio’s Grand Debut: Opening Up the Right Way
The moment has arrived—your container home studio is complete, and it’s time to share it with the world. But opening up isn’t just about throwing open the doors; it’s about introducing your studio in a way that sets the tone for its future.
Here’s how to make a splash with your studio’s debut:
- Host an open house to welcome friends, family, and potential clients.
- Share your journey on social media to inspire others and showcase your work.
- Consider partnering with local artists or businesses for a collaborative event.
- Remember to thank those who helped you along the way—gratitude goes a long way.
Your studio’s grand opening is more than a celebration; it’s a statement. It says you’ve built something remarkable, and you’re ready to make your mark. So go ahead, open up and let the creativity flow.
Maintenance and Upkeep: Protecting Your Investment
Building your studio is just the start. To keep it as inspiring and functional as the day it opened, regular maintenance is key. This isn’t just about fixing things when they break; it’s about preventative care to protect your investment and your creativity.
Here’s what regular upkeep should include:
- Inspect your studio regularly for wear and tear.
- Keep an eye on the integrity of the container’s structure.
- Address rust, leaks, or insulation issues promptly.
- Clean and organize your space to keep it conducive to work.
- Schedule annual checks for electrical and plumbing systems.
Think of maintenance as part of the creative process. A well-cared-for studio is a place where ideas can flow freely, without the distraction of a to-do list of repairs.

FAQs on Building a Container Home Studio in Hillsboro
What specific zones in Hillsboro allow container home studios?
In Hillsboro, container home studios are typically allowed in zones designated for residential use. However, it’s not a one-size-fits-all situation. Some areas may have specific overlays or design standards that impact your build. Here’s what you should do:
- Check the Hillsboro Zoning Map for the latest zoning information.
- Contact the Planning Department to confirm your plot’s zoning.
- Look for areas zoned as Residential (R), Mixed-Use (MU), or Employment (EMP).
- Be aware of any Historic or Conservation District regulations.
Understanding zoning is crucial to finding the right spot for your studio. Take the time to research, and you’ll save yourself a lot of potential headaches down the road.
How long does the permit process typically take in Hillsboro?
The permit process in Hillsboro can vary depending on the complexity of your project and the current workload of the Planning Department. Generally, you can expect:
- A preliminary review to take a few weeks.
- Additional time if revisions or further information is needed.
- The final permit approval to take several months in some cases.
Patience is key during this process. Plan for these timelines, and you’ll be less likely to encounter stressful surprises.
Can I build a container home studio without a permit in rural areas?
Even in rural areas, building without a permit is a gamble you don’t want to take. While regulations may be different, and enforcement not as strict, it’s important to stay on the right side of the law. Here’s why:
- Unpermitted structures can lead to fines or legal action.
- They may not be covered by insurance.
- Future buyers might be put off by the lack of permits.
- Your safety could be at risk if the structure isn’t up to code.
Always check with local authorities before building. It’s better to be safe than sorry, especially when it comes to your dream studio.
Are there any restrictions on the size or design of the container home studio?
Yes, Hillsboro has guidelines that dictate the size and design of all structures, including container home studios. These rules ensure that buildings are safe, aesthetically pleasing, and in harmony with the surrounding environment. Here’s what you need to keep in mind:
- There are maximum height and square footage limits based on zoning regulations.
- Setback requirements determine how close your studio can be to property lines.
- Design standards may influence the exterior appearance, including color and materials.
- Accessibility codes must be followed to ensure your studio is inclusive.
- Energy efficiency standards apply, so plan for proper insulation and windows.
Adhering to these restrictions doesn’t mean sacrificing creativity. It’s an opportunity to innovate within a framework, ensuring your studio is both unique and compliant.
What should I do if my construction plans do not comply with Hillsboro’s regulations?
If your initial plans hit a regulatory roadblock, don’t fret—it’s a chance to pivot and improve. Here’s how to handle non-compliance:
- Consult with the Hillsboro Planning Department to understand the specific issues.
- Consider hiring a local architect or contractor familiar with the regulations to help revise your plans.
- Explore the possibility of applying for a variance if your project has unique circumstances.
- Be flexible and willing to make changes to meet the necessary standards.
- Keep a positive mindset—every challenge is a step toward a better build.
Remember, the goal is to create a safe, sustainable, and legal container home studio. Embrace the process, and you’ll come out with a studio that’s not only compliant but also stronger for it.