Key Points
- Insulation is essential for temperature regulation and energy efficiency in container homes.
- Styrofoam, spray foam, batt, blown, and blanket are the primary types of insulation.
- Styrofoam is affordable and easy to install, while spray foam provides a superior seal.
- Batt insulation is conventional and cost-friendly, and blown insulation fills in all gaps.
- Blankets can be a quick DIY insulation solution but may not be as effective as other types.
Key Insulation Techniques for Eco-Friendly Shipping Container Homes
The Importance of Insulation for Container Home Comfort
Insulation is the unsung hero of any home. In a shipping container, where metal walls can make your living space feel like an oven or freezer depending on the weather, it’s even more important. The right insulation keeps the indoor climate just right and reduces energy use, which is both good for the planet and your pocketbook.
Deciding Between Do-It-Yourself and Already Insulated Containers
Before you start adding insulation to those metal walls, you need to make a choice: will you do it yourself, or choose a container that’s already insulated? Doing it yourself gives you control and can be more cost-effective, but already insulated containers save you time and effort.
My Favorite Container Homes Resource
I compared the top 3 Container Home Guides
to discover the ultimate resource!
See my top recommendation here
Getting to Know Insulation
How Insulation Helps with Temperature Control
Insulation can be compared to a thermos. It helps maintain the temperature of hot items and cold items by reducing the speed at which heat moves. When it comes to a container house, this means that your air conditioning or heating system won’t have to work extra hard to keep you comfortable.
Insulation: Your Home’s Best Friend
Insulation is not only about your comfort; it’s also about protecting everything inside your home. It keeps your electronics from overheating and your guitar from warping in the cold. It’s the best security system you can install.
Popular Insulation Options
Styrofoam Insulation: Versatile and Easy to Use
Styrofoam, also known as XPS (extruded polystyrene), is a light and easy-to-install insulation option. It’s the LEGO of insulation — simple, stackable, and can be fitted almost anywhere. It’s a particularly good choice if you’re on a tight budget.
How Effective and Long-Lasting is Spray Foam?
Think of spray foam as the stealthy insulation option. It slips into every nook and cranny, expanding to form a snug barrier that locks out both moisture and air. It’s a bit more expensive, but its effectiveness can’t be beaten.
The Classic Selection: Batt Insulation
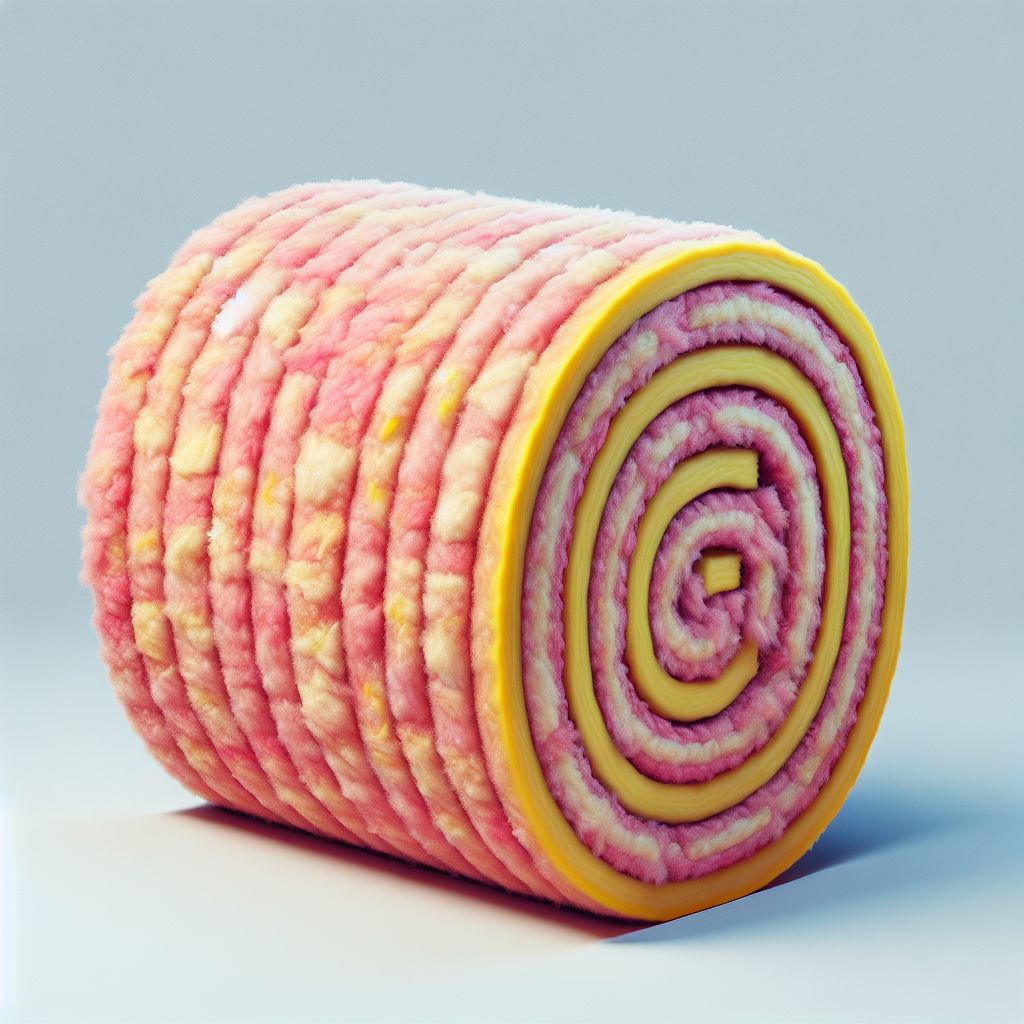
Insulation likely brings to mind images of batts — those fluffy pink rolls that resemble cotton candy, but are definitely not as delicious. They are a mainstay in the insulation industry because they work well and are cost-effective.
Blown Insulation: Filling Every Gap
Blown insulation is the equivalent of a cozy blanket for your home. It’s sprayed into every nook and cranny, ensuring there’s no room for the cold (or heat) to seep in. It’s ideal for those tricky, hard-to-reach places.
Blankets: A Quick and Easy Insulation Solution
When you need a quick solution, insulation blankets are a great option. As the name suggests, you simply roll them out and cover your walls. While it may not be the most comprehensive option, it’s certainly simple and can be installed very quickly.
Things to Consider When Selecting Insulation
What is R-value and Why Does it Matter?
The R-value is essentially the power level of your insulation — the higher the number, the better it is at preventing heat from seeping through your walls. Always aim for a high R-value to keep your shipping container home at the perfect temperature.
Optimizing Interior Space with Intelligent Insulation Choices
Keep in mind, insulation will consume some space. You want to maintain as much living area as possible, so think about thin, high-R-value options to achieve the best of both worlds — excellent insulation without giving up valuable living space.
Finding the Best Value for Insulation
Insulation is a critical aspect of your home that ensures comfort and energy efficiency. While it’s important not to compromise on quality, it’s equally important to stay within your budget. There is a point where cost and effectiveness intersect, and that’s where you’ll find the best bang for your buck.
Fighting Moisture in Your Cargo Container Home
Containers are made of metal and can easily gather condensation, which can then cause mold and rust. A home that is insulated well with a proper vapor barrier can keep these issues away, making sure your home stays dry and safe. For more information on ensuring the structural integrity of your container home, consider reading about stormproof container homes.
How Long Does it Take to Install Insulation?
Installing insulation is not a quick process. If you are doing it yourself, you should expect it to take at least a weekend. If you are short on time or patience, it might be worth it to buy a container that is already insulated or to hire a professional to do it for you.
Finding Insulated Shipping Containers
Leading Providers of Pre-Insulated Shipping Containers
There are a number of businesses that focus on pre-insulated containers. They offer a ready-to-use home in terms of insulation. Although the initial cost may be higher, it will save you time and energy in the future.
Transforming Refrigerated Containers for Optimal Temperature Regulation
Refrigerated containers, also known as “reefers,” come with insulation already installed. They’re the luxury suite of container homes — a little more expensive, but they provide superior temperature regulation without any additional effort.
Embracing the DIY Spirit with CoolBot Systems
For those who enjoy a good project and aren’t afraid to get their hands dirty, a CoolBot system might be just the ticket. This ingenious system can transform a standard shipping container into a refrigerated unit by fooling an air conditioner into believing it isn’t as cold as it actually is. It’s a smart solution for a heavily insulated space.
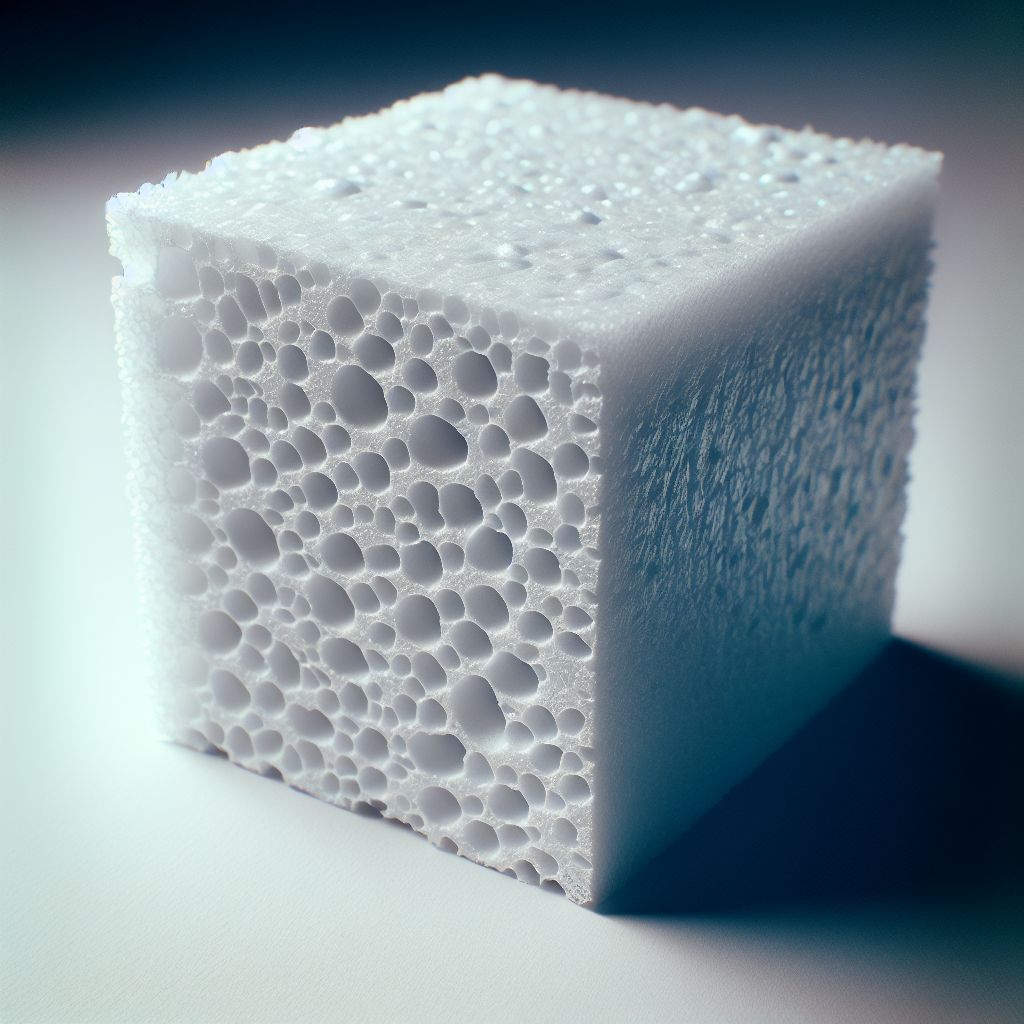
A Comprehensive Examination of Styrofoam Insulation
Understanding the Fundamentals of Styrofoam Insulation
Styrofoam, also known as extruded polystyrene foam (XPS), is a popular insulation choice due to its light weight, rigidity, and high R-value per inch of thickness. It’s created by melting polystyrene, a kind of plastic, with other chemicals to form a foam that is then molded into boards or panels. These panels are ideal for container homes because they can be cut to fit tightly between the corrugated walls.
Styrofoam Insulation: A Guide for the DIY Enthusiast
- Measure twice, cut once: Always double-check your measurements before cutting your Styrofoam panels to ensure they fit snugly.
- Use the right tools: Cutting Styrofoam is easy with a sharp utility knife or saw.
- Seal it up: After fitting the panels, use foam sealant to fill any gaps and prevent air leaks.
Styrofoam insulation is a weekend project you can handle, and it’s a great way to get to know the ins and outs of your container home.
What is the Cost of Styrofoam?
Styrofoam is a budget-friendly option when it comes to cost. Depending on the thickness and quality, you can expect to pay between $0.50 and $1.50 per square foot. For a standard 20-foot container, you’re looking at around $300 to $450 for the walls alone.
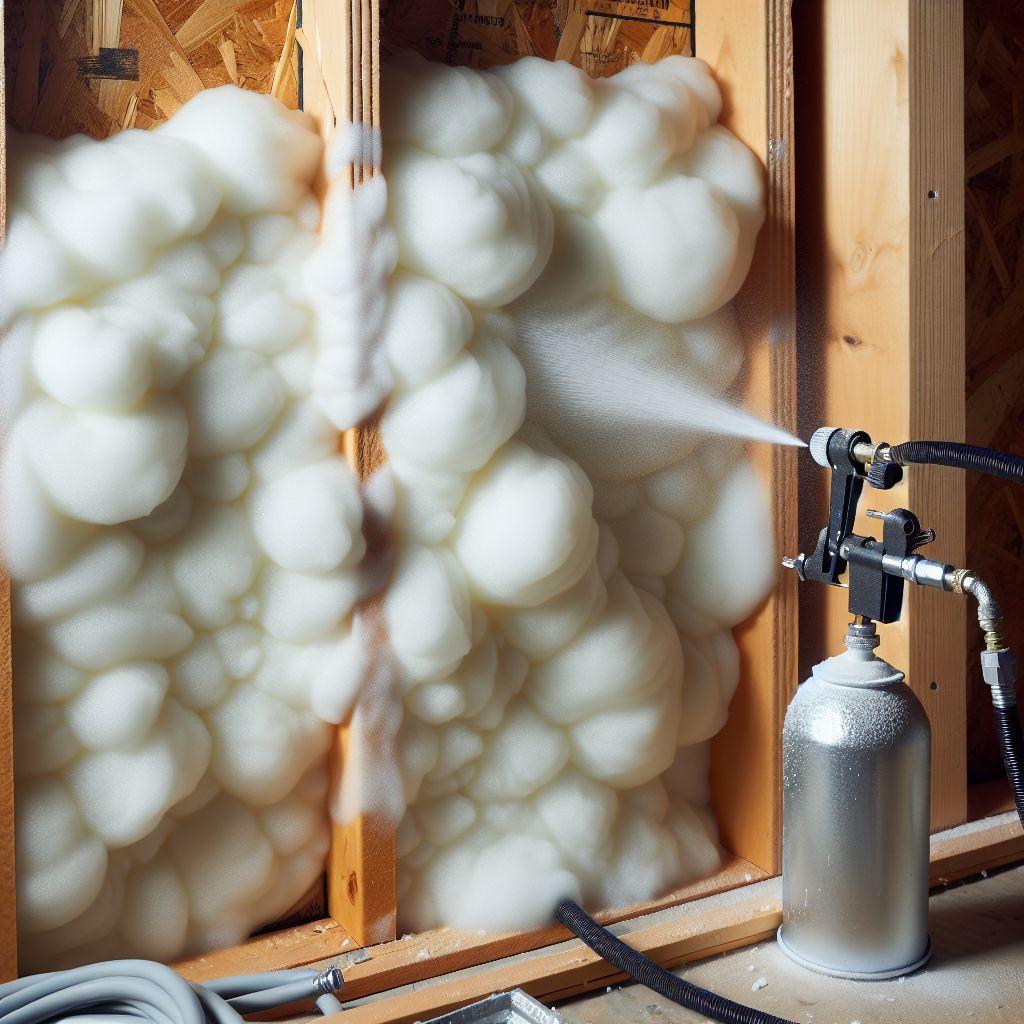
Understanding Spray Foam Insulation
Discovering the Advantages of Spray Foam Insulation
Spray foam is a standout in the insulation category due to its superior air sealing capabilities. It starts as a liquid and expands into a foam, filling every nook and cranny and creating an airtight seal. This means it not only insulates but also aids in preventing moisture issues — a significant advantage for metal homes that are prone to condensation.
Understanding the Spray Foam Installation Procedure
Installing spray foam is a slightly more complex process than Styrofoam. Protective gear is necessary as the chemicals used can be dangerous before they harden. The foam is sprayed directly onto the walls and expands rapidly, so it’s important to work in a systematic manner and ensure uniform application.
It’s crucial not to apply too much spray foam as it can expand significantly. Over-application can result in wasted material and even damage the container walls if the pressure becomes too high.
- Prepare the surface: Make sure the walls are free of dust and grease.
- Protect your health: Wear long sleeves, gloves, and a respirator.
- Ensure even application: Spray steadily to ensure a uniform thickness.
When it’s fully cured, spray foam is robust and long-lasting, providing insulation that will last for many years.
Cost Considerations of Spray Foam Insulation
Although spray foam tends to be pricier than Styrofoam, usually costing between $1 to $3 per square foot, it is important to note that for a 20-foot container, you may have to spend anywhere from $600 to $1,800. However, the sealing properties of spray foam can lead to substantial energy cost savings over time.

Getting to Know Batt Insulation
Everything You Need to Understand About Batt Insulation
Batt insulation, typically composed of fiberglass or mineral wool, is the traditional choice for insulation. It is available in rolls or pre-cut panels that can be installed between studs, joists, and beams. The fluffy substance captures air, which in turn slows down heat transfer.
How to Install Batt Insulation: A Step-by-Step Guide
- Measure the space: Be sure to know the dimensions between your framing so you can purchase the right size batts.
- Cut to fit: Use a straightedge and a sharp utility knife to cut the batts where necessary.
- Fit and secure: Position the batts between the framing and fasten them with wire hangers or adhesive, if needed.
Even though the installation of batt insulation is simple, it’s crucial to handle the material with care to prevent it from being compressed, which can decrease its effectiveness.
Evaluating the Cost of Batt Insulation
Batt insulation is an affordable option, with prices generally falling between $0.60 and $1.20 per square foot. For a 20-foot container, you can expect to pay somewhere between $360 and $720. For more details on insulation options and their costs, check out our guide on efficient heating and cooling systems for container homes.
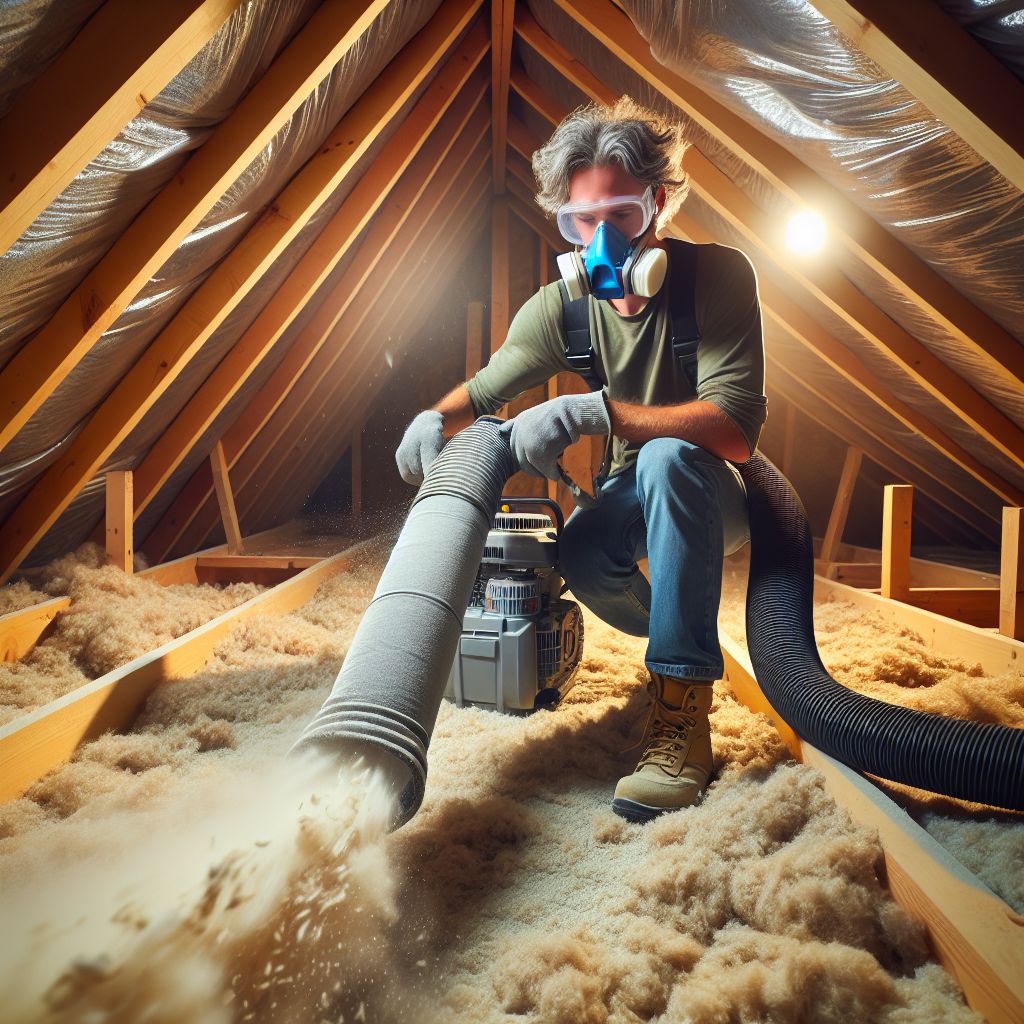
Understanding Blown Insulation
Blown Insulation Materials and Methods Explained
Blown insulation, also known as loose-fill, is a type of insulation that is composed of tiny pieces of fiber, foam, or other materials. It is installed by blowing the material into the desired space. This method is perfect for insulating irregular spaces and for adding insulation to areas that are already finished.
Getting the Hang of Installing Blown Insulation
Blown insulation installation usually requires special equipment that you can frequently rent from stores that sell home improvement items. It’s a job for two people: one to put the material in the hopper and one to handle the hose. The goal is to spread it evenly without missing any spots.
- Acquire the necessary tools: Secure a blower machine and all required hoses.
- Set up the area: Close off any gaps where the substance could leak out.
- Apply the insulation: Move in a back-and-forth pattern to create a uniform layer of insulation.
Blown insulation can be somewhat untidy, but it’s excellent at filling every crevice.
How Much Does Blown Insulation Cost?
Blown insulation prices can fluctuate based on the type of material used. However, you can typically expect to pay somewhere in the range of $0.40 to $0.60 per square foot. So, for a 20-foot container, you’d probably be looking at a total cost of $240 to $360.
Exploring the Use of Blanket Insulation
Understanding the Basics of Blanket Insulation
Blanket insulation is essentially large rolls of fibrous material, quite similar to batts, but usually without the added facing. They are made to be rolled out and cut to size, making them a convenient choice for large, open spaces.
Here’s How You Install Blanket Insulation
- Size it up: Figure out how much you need.
- Roll out: Place the blankets where you want insulation.
- Snip and tuck: Use a utility knife to cut the blankets to the right size.
Blanket insulation is a fast fix, but it’s not as exact as other options, so it’s a good idea to use it with another type of insulation for the best outcome.
Assessing the Affordability of Blanket Insulation Solutions
Blanket insulation is one of the most wallet-friendly options, with prices hovering around $0.30 to $0.50 per square foot. For a typical 20-foot container, that means you’re looking at approximately $180 to $300 in material costs.
What to Think About Before Installing
Now that you’ve chosen your insulation, that’s fantastic! But, before you start installing, there are a few things you need to think about. The way you install it can really make a difference to how well the insulation works. And don’t forget, it’s really important to install it correctly to get the most energy efficiency and to lose the least amount of heat.
Why You Should Consider Hiring a Professional for Insulation Installation
Though doing it yourself can save you some cash, hiring a professional to install your insulation guarantees that the job is done correctly. Professionals have the right tools and the expertise to install insulation in a quick and efficient manner. They can also identify potential problems, like areas that are more likely to get wet, and take measures to prevent mold and rust.
More importantly, they are well-versed in the safe management of various insulation materials. For instance, fiberglass batts can cause skin and lung irritation, while spray foam chemicals necessitate careful handling.
- Find local experts and read their reviews.
- Obtain several estimates to make sure you’re not overpaying.
- Inquire about their specific experience with container homes.
Paying for professional installation can prevent future problems and guarantee that your container home is properly insulated.
Getting Your Container Ready: Insulation Prep Checklist
Before you start insulating, whether you’re doing it yourself or hiring a professional, your container needs to be prepped. This checklist will help you get your container ready for a hassle-free insulation installation:
- Make sure the container is free of dirt and moisture.
- Eliminate any rust and fix any holes or dents.
- If you’re using fiberglass, batt, or blanket insulation, install a vapor barrier.
- Before insulating, make arrangements for electrical wiring and plumbing.
- Check your local building codes to see if there are any requirements or restrictions.
Preparation is key. A well-prepared container will ensure that your insulation works as effectively as possible, keeping your living area comfortable and energy-efficient.
Overview
Insulation may not be the most glamorous part of a shipping container home, but it’s definitely one of the most important. It’s the barrier that keeps the weather outside where it belongs, and ensures that your green home is as cozy as it is environmentally friendly. Styrofoam, spray foam, batt, blown, and blanket insulation all have their pros and cons, and the best choice for you will depend on your unique needs, budget, and dedication to green living.
Final Verdict: Choosing the Right Insulation for Your Container Home
The best insulation for your container home is the one that suits your needs, budget, and environmental considerations. Styrofoam and batt insulation are economical and easy to install yourself. Spray foam and blown insulation provide top-notch sealing and energy-saving properties. Blanket insulation is a fast and simple solution, ideal for temporary repairs or additional insulation.
Keep in mind the advantages and disadvantages of each type, the R-value you require, the amount of space you can afford to lose, and the amount you’re prepared to spend. Also, consider the long-term energy cost savings and the environmental implications of your decision.
Pushing Forward: Constructing a Comfortable, Eco-Friendly Home
By choosing the correct insulation for your shipping container home, it can be transformed into a cozy, green living space. It’s not just about maintaining the right temperature; it’s about building a home that’s energy-saving, environmentally-friendly, and a pleasure to reside in. So, make sure to select your insulation thoughtfully, install it with care, and reap the benefits of your hard work for many years.
Comparison of Insulation Types Summary:
| Type of Insulation | R-Value per Inch | Cost (per sq. ft.) | Difficulty of Installation | Eco-Friendliness |
|---|---|---|---|---|
| Styrofoam (XPS) | 4.7 – 5.0 | $0.50 – $1.50 | Easy | Moderate |
| Spray Foam | 6.0 – 7.0 | $1.00 – $3.00 | Moderate | High |
| Batt Insulation | 3.1 – 4.3 | $0.60 – $1.20 | Easy | Low |
| Blown Insulation | 2.2 – 3.8 | $0.40 – $0.60 | Moderate | Moderate |
| Blanket Insulation | 2.9 – 4.0 | $0.30 – $0.50 | Easy | Low |
Reference Links:
https://www.discovercontainers.com/5-methods-to-insulate-your-shipping-container-home/
https://tinyhouseme.com/all-you-need-to-know-about-container-home-insulation/
How to Insulate Your Container Home
Want to insulate your container home? Here’s your step-by-step guide:
- Choose the type of insulation you want based on R-value, space, and budget.
- Use the provided checklist to prepare your container.
- Measure your space and buy the right amount of insulation.
- Install the insulation, following best practices for each type.
- Seal any gaps and install a vapor barrier if necessary.
- Enjoy your warm, eco-friendly shipping container home!

Frequently Asked Questions (FAQ)
What is the Most Eco-Friendly Insulation for a Shipping Container Home?
Spray foam, particularly those made from soy or other renewable materials, is usually the most eco-friendly option, offering high R-values and excellent air sealing properties.
What’s the Process for Installing Insulation in a Shipping Container Home?
Though the process can differ depending on the type of insulation you choose, typically it involves measuring, cutting, and fitting the insulation, then sealing it in place. For specific insulation types, such as storm-proofing insulation, always refer to the manufacturer’s guidelines or consider hiring a professional to ensure the job is done correctly.
Is it Possible to Insulate a Shipping Container House on a Limited Budget?
Yes, Styrofoam and batt insulation are affordable options and can be installed by the homeowner to save on labor costs.
Do I Need to Hire Professionals for Container Insulation?
While it’s not required, having professionals install your insulation can ensure the job is done right and quickly, which could save you money over time. For more information on the benefits of professional installation, consider reading about shipping container house safety.
What is the Lifespan of Insulation in a Shipping Container Home?
With correct installation, the majority of insulation types can last as long as your home does, generally many decades.
When considering insulation for a shipping container home, it’s essential to evaluate the different options available. Styrofoam, spray foam, batt insulation, blown insulation, and blankets are all viable choices, each with their own set of benefits and drawbacks. The right insulation can significantly affect your container home’s energy efficiency and comfort level.