
Key Takeaways
- Screw/Twist Bridge Clamps are vital for securely coupling shipping containers side-by-side.
- These clamps are adjustable, ensuring a tight fit between containers of standard ISO dimensions.
- Using these clamps enhances stability during transport, reducing the risk of accidents.
- Installation is straightforward and can be done post-positioning of the containers.
- Regular maintenance is crucial for ensuring the longevity and safety of the clamps.
Revolutionizing Logistics with Screw/Twist Bridge Clamps
Imagine you’re building with blocks. You want your creation to be strong, to stay together even if you move it. That’s where screw/twist bridge clamps come in, but for the big metal blocks we call shipping containers. These handy tools are like super-strong rubber bands for containers, making sure they stick together side-by-side during their journey by land or sea.
Streamlined Container Assembly
When you use screw/twist bridge clamps, you’re choosing a tool that’s been designed to make life easier. These clamps quickly connect containers, which means they can be loaded, locked, and ready to go in no time. It’s like snapping on a lid—simple and secure.
My Favorite Container Homes Resource
I compared the top 3 Container Home Guides
to discover the ultimate resource!
See my top recommendation here
Enhanced Stability and Security
More than just keeping containers together, these clamps provide peace of mind. They ensure that the containers won’t shift or slide apart when they’re being moved around by giant cranes or bouncing over the waves. It’s all about keeping the cargo safe, and that’s a big deal.
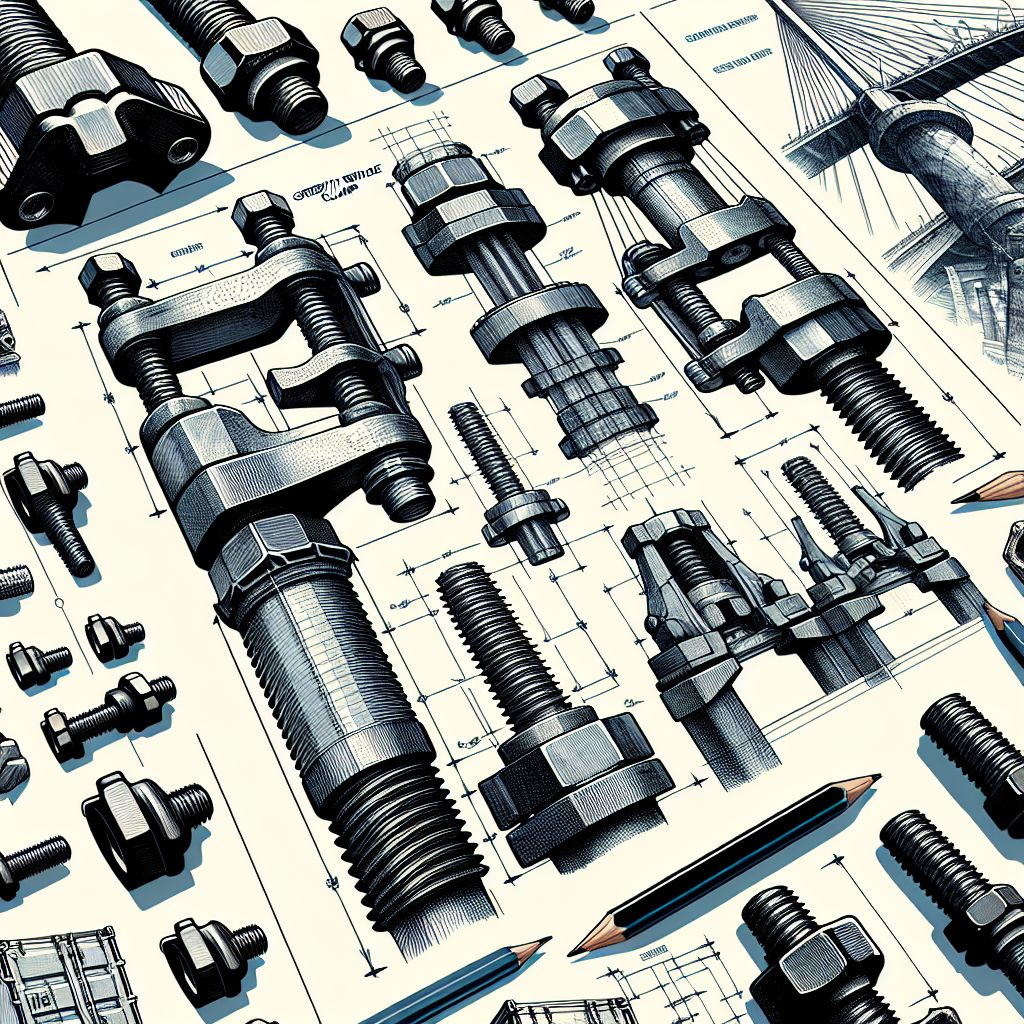
The Mechanics of Screw/Twist Bridge Clamps
Let’s dive into how these clamps work. They have a twist or screw mechanism that tightens to lock containers together. Think of it like tightening a lid on a jar. Once it’s on, it’s not coming off without some effort. That’s the kind of security we’re talking about for your containers.
It’s important to know that these clamps are made to be tough. They’re usually constructed from heavy-duty steel and are treated to resist rust and corrosion. So, they’re ready to face the harsh conditions of sea travel and keep holding on tight.
Now, you might wonder, how do you actually put these clamps on? It’s pretty straightforward. They’re designed to be user-friendly, so with a little practice, anyone can secure containers like a pro.
- Place the clamp over the corner castings of the containers you’re coupling.
- Twist or screw the mechanism until it’s tight and the containers are pulled together.
- Double-check to make sure everything is secure before moving the containers.
How Screw/Twist Bridge Clamps Work
Imagine you’re tying your shoes. You want that knot to be tight so you don’t trip. Screw/Twist Bridge Clamps work on a similar principle, but they use a metal screw or twist action to pull and hold the containers tight.
When you’re connecting two containers, you align them so their corner castings (the reinforced corners) are next to each other. Then you take the clamp, with its screw or twist mechanism, and attach it to the corner castings. As you tighten the clamp, it pulls the containers together, creating a solid connection.
Key Components of a Screw/Twist Bridge Clamp
Let’s break down the parts. You’ve got the body of the clamp, which is the main piece that stretches over the gap between containers. Then there’s the screw or twist mechanism—this is the part you turn to tighten the clamp. And finally, you have the hooks or bolts that latch onto the corner castings of the containers.
Each part plays a role in making sure the containers don’t go anywhere once they’re clamped together. It’s a team effort, and every piece is crucial.
Types of Screw/Twist Bridge Clamps
Not all clamps are made the same. Some are designed for lightweight jobs, while others are built for the heavy lifting. It all depends on what you’re moving and where it’s going.
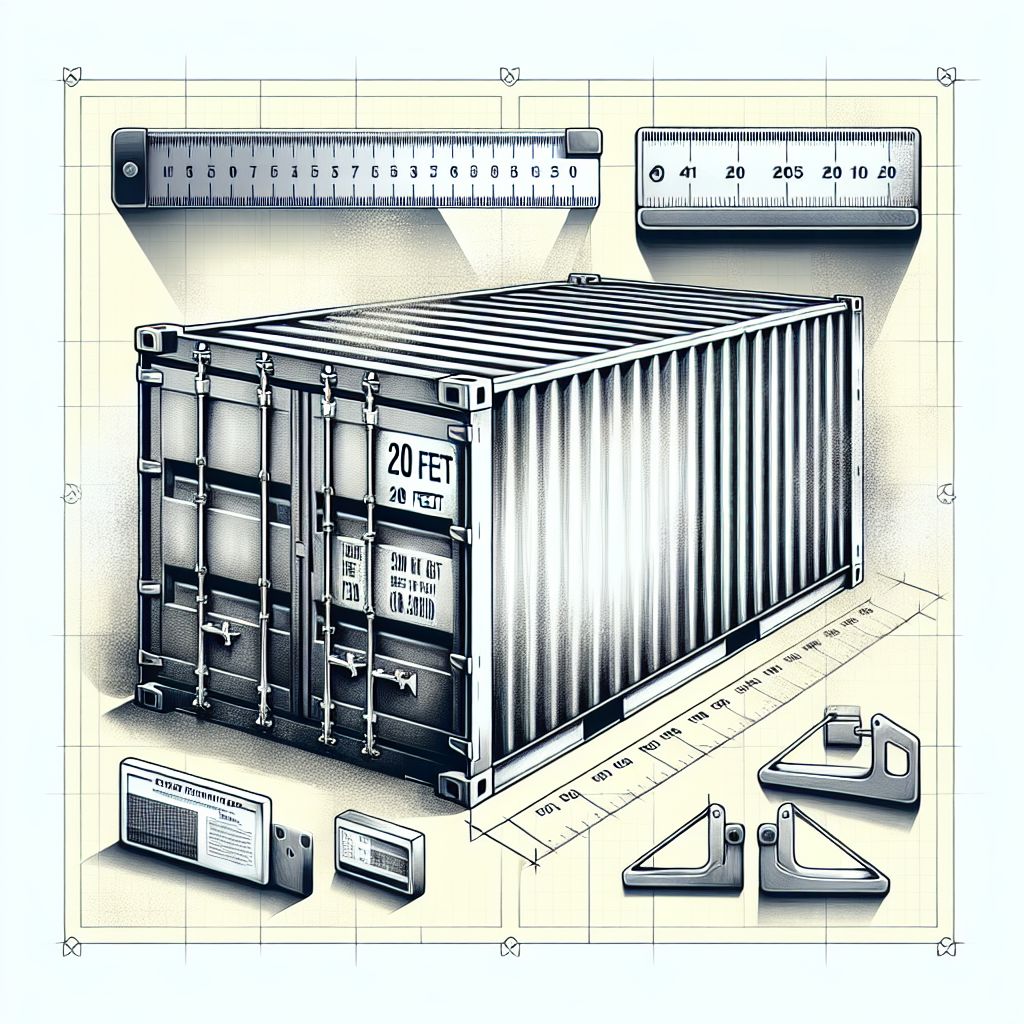
Most clamps you’ll find are made to fit standard ISO container sizes. That’s because the shipping industry likes things to be uniform. It makes life a lot easier when you know that one size fits all.
Standard Sizes and Their Applications
Standard clamps usually come in a few sizes, but they’re all designed to do the same thing—keep those containers together. You’ll find that they can adjust a bit to get just the right fit, which is super handy.
For example, you might have a clamp that’s 260mm in length. That’s a common size, and it’s perfect for horizontal coupling, which is just a fancy way of saying “putting containers side by side.” And because they can be installed after the containers are already in place, they’re really convenient.
Let’s pause here. In the next section, we’ll look at how these clamps can make a difference in container logistics, and we’ll go through the installation process step by step. Stay tuned for more practical tips on keeping your containers safe and sound.
References:
https://universal-containers.com/bridge-clamps/
https://containermodificationworld.com/products/bridge-fitting
https://www.budgetshippingcontainers.co.uk/sales/shipping-container-bridge-clamps/
https://www.quickfitcontaineraccessories.co.uk/shop/bridge-clamps/shipping-container-bridge-clamp/
https://www.amazon.co.uk/Quickfit-Container-Accessories-Shipping-Bridge/dp/B07ZC9R7N8
Additional details:
- Installation process: Twist the shaft until grips are about 200mm apart, insert across adjacent corner castings, rotate shaft to tighten grips, and secure with lock nut .
- Material: Made of drop forged steel hooks with a hot-dip galvanized finish for durability and weather resistance .
- Compatibility: Designed to fit into container corner castings and compatible with all ISO type containers .
- Quantity needed: Typically, four clamps are used to secure two containers together – one at each corner .
- Maintenance: Regular checks are advised, especially if containers are frequently accessed. Some users weld the 50mm nut in place to prevent loosening .
- Limitations: Not designed for hanging containers, creating overhanging units, or lifting multiple containers simultaneously .
- Comparison to interlocks: Bridge clamps are less strong than interlocks for vertical stacking but offer the advantage of post-stacking installation .
Why Clamps Are Crucial for Container Logistics
Let’s get straight to the point: clamps are the unsung heroes of container logistics. Without them, the whole concept of containerization would be shaky—literally. Containers need to be held securely, whether they’re stacked on a cargo ship or hitching a ride on a cross-country train. That’s where clamps come in, ensuring everything stays put.
Think about it this way: if containers aren’t properly secured, they can shift during transport. This not only damages the containers and the goods inside but also poses a serious safety risk to workers and equipment. That’s why reliable clamps are more than just a good idea—they’re a necessity.
Now, with screw/twist bridge clamps, we’re looking at a game-changer in the world of container logistics. These clamps provide a strong, adjustable, and durable solution for container coupling, making them an essential tool for shipping and storage operations worldwide.
Benefits of Using Screw/Twist Bridge Clamps
The advantages of using screw/twist bridge clamps are clear and significant:
- Stability: They secure containers in a fixed position, preventing movement that can lead to damage.
- Versatility: These clamps are adjustable, fitting a range of container sizes and ensuring a snug coupling.
- Efficiency: They can be quickly installed and removed, speeding up the process of container handling.
- Safety: A secure clamp connection reduces the risk of accidents during transport or storage.
- Durability: Made of tough materials, these clamps withstand harsh weather and rough handling.
The Role of Clamps in Modular Construction
Besides transportation, screw/twist bridge clamps play a pivotal role in modular construction. As the building blocks of pop-up shops, emergency housing, and even multi-story buildings, shipping containers are the Lego of the construction world. The clamps hold these structures together, ensuring they’re strong enough to stand up to the elements and everyday use.
Installing Screw/Twist Bridge Clamps
Installing these clamps is not rocket science, but it does require attention to detail. The process is straightforward: align the containers, place the clamps, and tighten them down. But don’t let the simplicity fool you—proper installation is crucial for safety and stability.
- Start by positioning the containers so that their corner castings are adjacent to each other.
- Open the clamp and place it over the corner castings, ensuring it’s seated properly.
- Use the screw or twist mechanism to tighten the clamp until it’s firmly holding the containers together.
- Check each clamp to make sure it’s secured tightly and correctly.
Remember, it’s not just about getting the clamp on—it’s about making sure it’s on right. A loose clamp is like a loose knot; it won’t hold when you need it to.
Step-by-Step Installation Guide
Let’s break it down even further:
- Align the Containers: Place the containers side by side so that the corner castings line up perfectly.
- Position the Clamp: Set the clamp over the corner castings, making sure it’s centered and ready to be tightened.
- Tighten: Turn the screw or twist handle clockwise until you feel significant resistance, indicating a secure fit.
- Double-Check: Give the clamp a tug to ensure it’s not going anywhere. If it moves, tighten it further.
- Repeat: Do the same for all four corners where the containers meet.
With these steps, you’ll have a container duo that’s ready for whatever comes their way—high seas, highway speeds, or just the occasional bump from a forklift.
Troubleshooting Common Installation Challenges
Sometimes, things don’t go as planned. Maybe the clamp isn’t tightening properly, or it’s not sitting right on the corner castings. Here’s what to do:
- If the clamp won’t tighten, check for debris or damage to the threads on the screw mechanism.
- Ensure the corner castings are free from rust or dents that could prevent the clamp from securing properly.
- If the clamp is too loose or too tight, adjust the length if it’s an adjustable model, or verify you’re using the correct size for your containers.
Most issues can be resolved with a bit of troubleshooting, but always have spare clamps on hand—just in case.
Maintaining Your Screw/Twist Bridge Clamps
Like any tool, screw/twist bridge clamps need a little TLC to keep them in top shape. Regular maintenance ensures they’ll be ready to perform when you need them most.
Here’s a quick checklist for clamp care:
- Inspect clamps regularly for signs of wear, such as rust or damaged threads.
- Clean them after use, especially if they’ve been exposed to saltwater or corrosive materials.
- Lubricate the screw mechanism to keep it turning smoothly.
- Store clamps in a dry, protected space to prevent unnecessary exposure to the elements.
And remember, if a clamp looks questionable, it’s better to replace it than risk a failure during use.
Longevity and Wear: When to Replace
Clamps are sturdy, but they’re not immortal. Over time, they will wear out. How do you know when it’s time for a new one? Look for these signs:
- Visible cracks or severe rust on any part of the clamp.
- The screw mechanism no longer tightens or loosens easily.
- The clamp doesn’t hold the containers as tightly as it used to.
When in doubt, swap it out. It’s always better to play it safe with equipment that’s responsible for holding tons of metal and cargo together.
Now that you’re armed with knowledge about screw/twist bridge clamps, you’re ready to tackle container coupling like a pro. Stay tuned for the final part of this guide, where we’ll delve into the do-it-yourself versus professional installation debate and answer some frequently asked questions.
Do-It-Yourself vs. Professional Installation
When it comes to installing screw/twist bridge clamps, you might wonder whether it’s a task you can handle on your own or if you should call in the pros. Let’s talk turkey about both options.
The Pros and Cons of DIY Clamp Installation
Going the DIY route can save you some cash and give you a sense of accomplishment. It’s like baking your own bread—you put in the work, and you get to enjoy the results. But, it’s not for everyone. You need to be comfortable with tools, and you have to be precise. If you’re the kind of person who can follow instructions to the letter and you have a good set of tools, you might be ready to give it a go.
On the flip side, if you’re all thumbs when it comes to manual tasks, or if the thought of handling heavy clamps makes you break out in a sweat, you might want to leave it to the professionals. There’s no shame in that. Safety is the top priority, and if you’re not confident, it’s better to get someone who is.
When to Call in the Professionals
If you’re dealing with a large-scale project, have safety concerns, or simply don’t have the time, calling in the pros is the way to go. They have the experience, the right tools, and they know how to tackle unexpected issues.

Frequently Asked Questions (FAQ)
Can I use these clamps for vertical connections?
Yes, you can use screw/twist bridge clamps for vertical connections, but they’re primarily designed for side-by-side coupling. If you’re stacking containers, you’ll want to use a different type of clamp that’s made for that purpose. It’s like using the right kind of nail for the job—you wouldn’t use a roofing nail to hang a picture frame, would you?
How often should I inspect the clamps?
Inspect your clamps at least every six months, or more frequently if they’re used in harsh conditions. It’s like checking the batteries in your smoke detector—you want to be sure they’re working before you need them. If a clamp shows signs of wear or damage, replace it immediately. It’s better to be safe than sorry.
Are these clamps suitable for all weather conditions?
Screw/twist bridge clamps are tough cookies. They’re designed to handle all sorts of weather, from scorching sun to freezing cold. But, like anything else, extreme conditions can take their toll. Regular maintenance will help your clamps last longer, no matter what Mother Nature throws at them.
Can screw/twist bridge clamps secure loaded containers?
Absolutely! These clamps are built to handle the weight of loaded containers. Just make sure you’re using the right size and number of clamps for the weight you’re dealing with. It’s like carrying groceries—you wouldn’t use a paper bag for a gallon of milk and a bunch of canned goods, right?
Do I need to tighten the bridge clamps over time?
Yes, it’s a good idea to check the tightness of your clamps periodically, especially after they’ve been through a lot of movement or vibrations. It’s like tuning a guitar—you want to keep it sounding just right, and in this case, keeping your containers just right means keeping them safely secured.
And there you have it! Everything you need to know about screw/twist bridge clamps for shipping container side-by-side coupling. Remember, the key to safe container transport is using the right tools and keeping them in good working order. Now, go forth and secure those containers like a pro!


Leave a Reply